
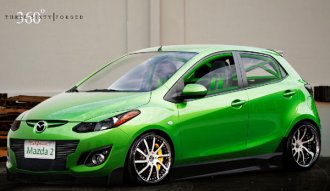
Virtual Tuning car
 April 12, 2010 in Featured, Photoshop by Rufino
Virtual tuning body kit using brush techniques (Adobe Photoshop CS 3)
In this tutorial I`ll be using Adobe Photoshop CS3 but you can use any version of Adobe Photoshop.
There is an image for every step that will be very helpful.
After you have made all the steps you`ll be able to make an original bodykit for your car using 100% brush/dodge/burn tool techniques .
Pintilei Adrian-Dumitru is a graphic designer in Romania. He learned how to use graphic design software by practicing virtual-tuning projects for several years. He lives with his parents in a little village called Vorniceni but he studies at the National College A.T. Laurian in Botosani, Romania. His dream is to be an important computer-programmer in his country.
Tutorial Details
- Program: Adobe Photoshop
- Version: CS 3
- Difficulty:Intermediate
Step 1: Starting the tutorial
Open a picture with a car
Step 2: Place it into a new background.
I moved the car in the new background . If you don`t know how, search for “Virtual Tuning Tutorial Part 1 ” on the Instatuts site.
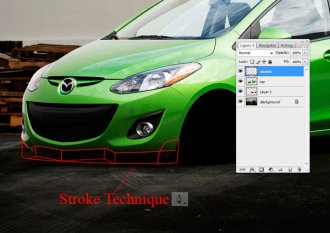
Step 3: Stroke technique
Make a new layer, call it “Sketch”. Using Stroke Path technique (Brush size : 2px) make next sketch :
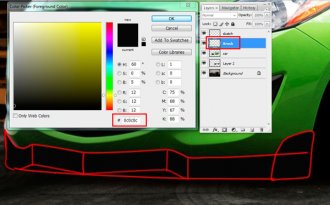
Step 4: Brush technique
Make a new layer, call it “Brush ”, put it under the “sketch” layer then fill it with the selected color.
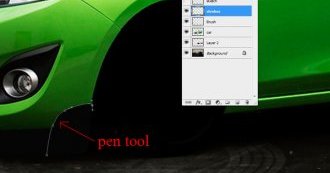
Step 5: Lighting
With pen tool, make next path :
Step 6
Again use stroke technique with the white color, (Brush size : 2px size ), then erase the bottom of the stroke :
Step 7
 Using same stroke technique make all the edges.
Step 8: Pavement reflections
Select the “Background” layer, make a selection like in the next image using PEN TOOL or LASSO TOOL then, right click – Layer via copy :
Step 9
Put the selected pavement on the front bar, lower the opacity and erase a little in the bottom of the reflection.
Step 10
Like in the step 9, copy a piece of pavement.
Step 11
Lower the opacity, and erase a little in the right part of the reflection.
Step 12
Repeat those steps for all the front bumper
Step 13: Gaussian Blur
Blur a little the white strokes using Gaussian Blur ( 0.3 px )
Step 14
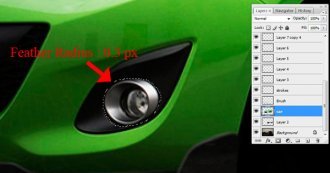
Select this part . Use Feather Radius on 0.3 px.
Step 15
Right click -> Layer via copy
Step 16: Resizing
Edit-Free Transform :
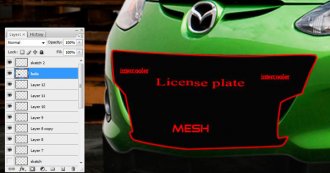
Step 17: Stroke sketch
Make a new layer, make next sketch for orientation . I used pen & brush tool for the sketch. (Brush size : 2px)
Step 18
 Select and fill the selection with black color (Remember, for better selections use Feather Radius : 0.3 px )
Step 19
Make next selection :
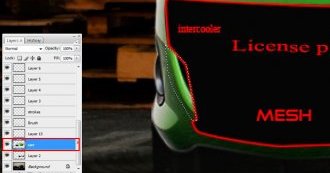
Step 20: Smudge tool
Select the “car” layer and smudge like in the next picture :
Step 21: Repeat step 20
Repeat step 20 .
Step 22: Smudging result
You should obtain something like this :
Step 23:Update sketch
I added some new elements on the sketch.
Step 24: Highlights/shadows
Make a new layer, call it “Highlights/Shadows”, select next color :
Step 25
With pen tool make next path :
Step 26:Stroke technique
Right Click – Stroke path ( Brush size : 2px)
Step 27
Erase the parts where the light can`t reach.
Step 28: Resize the stroke layer
Duplicate the “Highlights/Shadows” then resize a little.:
Step 29
Replace green color with white color.
Step 30
Lower the opacity to 40%
Step 31
Select this part (Remember, for better selections use Feather Radius : 0.3 px )
Step 32: Add Mesh
Load the selection in the picture with the mesh donor.
Share this article
Related Posts


Latest Posts


