November 5, 2021

How to design and Build a car?
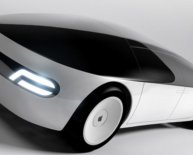
 We may never drive cars covered in photovoltaic cells like the one in this picture, but building a miniature solar car is a fun way to see how solar energy can be used for power. In this project you will need creativity and experimentation to design and build a car powered by two solar cells and a small electric motor. Get some design ideas from the pictures on this website. The National Renewable Energy Laboratory has a PDF curriculum that will also give you ideas and help you learn about the scientific and engineering principles behind building a solar car. (Adult supervision is recommended for this project.)
What You Need:
- Small electric motor (Look at hobby or electronics stores, and make sure you get one with a motor pulley)
- For the car body: cardboard milk carton, water bottle, cardboard, foam board, or similar materials
- For the wheels: plastic bottle caps, film canister caps, toy wheels such as K'nex, etc.
- For the axles: Stiff wire or wooden shish-kabob skewers
- Straws or eye screws to mount the axles
What You Do:
- Choose a material for the car body, which is called the chassis. Think carefully about this: you want something strong, but also something lightweight so it needs less power for the motor to move it. (But be careful — if it's too light, it can easily get blown about by the wind.) A big part of engineering is finding the right balance between weight and strength.
- Use a nail to poke a small hole in the center of your wheels. Make sure the stiff wire or wooden skewers you use for axles fit in the holes tightly. Take an extra cap and cut off the sides, leaving just the top part, which usually has a small inner rim to help keep the bottle from leaking. Glue this cap to one of your wheels. You have just created a pulley for your driving wheel; the inner rim of the extra bottle cap will support your car's drive belt. (You can try using a film canister cap for this step instead of cutting a bottle cap. If you are using toy wheels like K'nex, you can just use a smaller wheel mounted on the inside of your main wheel to act as the pulley.)
- Now, mount your axles onto the chassis. Depending on what your chassis is made of, you can thread the axle through eye screws mounted on the bottom. Another easy method is to tape straws on the underside of the chassis and thread the axles through them. (Use our balloon rocket car project as reference for how to do this.)
- Attach the small motor pulley to the motor shaft. Determine where to mount the motor by connecting the driving pulley with the motor pulley using an elastic band as a drive belt. Position the motor so the band is slightly stretched (but don't stretch it too much!). Mount the motor with glue or tape it in between a small frame of wood or cardboard blocks.
- Use clear plastic tape to attach the two solar cells together side-by-side; then connect them in a series circuit using the alligator clip leads. Connect the positive terminal of one cell to the negative terminal of the other. Connect the remaining terminals to the motor. If the motor spins the wrong way, switch the leads where they connect to the motor. Once it's connected properly, you'll probably want to use to tape to help keep the wires under control.
- Mount the solar cells on the chassis at an angle where they will receive the most sun. Take your car outside to a sunny sidewalk, connect the drive belt, and watch it go!
Share this article
Related Posts
Latest Posts


