How to Create Car?
 In this tutorial you will learn to create a pixel art car in the isometric view. Compatible with our isometric pixel art characters from the previous tutorial so be sure to check that out first. If you’re ready, launch Adobe Photoshop and get ready to get your characters into cars and to delve deeper into isometric pixel art.
Create an Isometric Pixel Art Car
In this tutorial you will learn to create a pixel art car in the isometric view. Compatible with our isometric pixel art characters from the previous tutorial so be sure to check that out first. If you’re ready, launch Adobe Photoshop and get ready to get your characters into cars and to delve deeper into isometric pixel art.
1. Figuring Out the Dimensions
We’ll be using the characters a bit as a base to work out the dimensions of our car. It doesn’t need to be too perfect or technical, we just want to make the elements look like they belong to the world of our characters.
Step 1
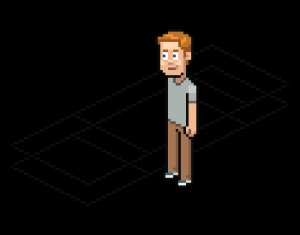
Get your group of characters… or if you only have one, replicate it until you have four as we’ll be making a car that sits four.
Step 2
 We won’t be changing the characters’ positions for now but even standing up, they’ll help define the size of the car.
So place them in two rows with a little bit of elbow room.
Step 3
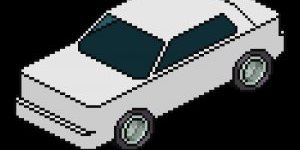
And now we can draw a space that can roughly contain them. We don’t need to be very strict about the space inside the car because we won’t be showing the interior.
Now, in a New Layer, we draw a square in the isometric view. It’s pretty simple, the lines are 2:1, meaning they shift 2 px horizontally for every 1 px vertically.
 You can do them many ways: draw the lines up pixel by pixel, draw two pixels with the pencil tool and then replicate that again and again, draw a single pixel with the pencil tool and at a distance draw another pixel while holding down shift (a line is drawn automatically connecting both points… but this takes some guesswork) or simply use the line tool (with anti-alias set to off) which would be the ideal method if only that tool was reliable for pixel art purposes.
Step 4
With the rectangle for the interior already defined, let’s add a few extensions that will make for the front and the rear of the car. Both will be shorter than the interior, the rear being the shortest.
Step 5
Now Copy and Paste these lines, leaving the new copy on the same place as the previous but moving it straight up a distance that would make sense between the ground and the bottom of the car. In this case I went with 8 px.

Share this article
Related Posts

Latest Posts


